finally started!

Discussion about making bushwalking-related equipment.

finally started!

Postby Gadgetgeek » Sun 24 Aug, 2014 2:41 pm

Got some stuff from Simon over at Tier, and got a UQ built!I would give my stitching a D+, my skills are a bit rusty.
Outer is some red/orange argon90 (this stuff is awesome, I'm stoked to use it on my top quilts) the black is some cheap PU coated nylon. The liner side is just nylon taffeta to allow good airflow into the quilt (and because I'm cheap) fill is two layers of 2.1 climashield. I was going to do a single layer, but during the initial testing, I wasn't 100% on it, so I figured better to go warmer, as its easier to adjust cooler. Suspension is 2mm shock, and dutch quilthooks. I did some quilting by hand, just to hold the fill in place a bit, its not that great, and I'm debating just running some quilting lines over the whole thing. But I'll see how it goes on the trip I'm taking next week. It will be paired with a light down bag as a TQ for the trip.
I plan to do a 6oz set, and I'm thinking a 2.2 top quilt. Which should give me some pretty good adaptability. I don't think I'll have time to get those done in time for the trip, but it may happen. In which case it will come down to the forecast as to what I take. (although since its a paddling trip with an enforced swim, my bet is I'll take the warmest of what I have)

Some lessons learned. It ends up being pretty much exactly my height, which means I lost more than I planned on in length. But thats my poor planning skills. So I'll do the other ones longer. I wanted 1mx2m, and got a little less than that, so it works, but for the 6oz, which is going to be my solid cold weather set, I'll oversize them quite a bit more. I lost about 10cm out of the width, and 20 out of the length.
Very happy with the compressibility, and pack-ability of the UQ.
One thing I will probably do for the rest of the set is to keep the argon to the TQ, I'm feeling like its big advantage is the feel, so I'd rather have that where I feel it. Some may differ on that, But thats my thoughts, so it will probably be reserved for the top half of the quilt, where I'll feel it most. So yeah, a few screw-ups, and quite a bit of seam ripping, but when its all said and done, I'm happy with what I've come out with.
Next project is a big tarp, Its an offset diamond/hex hybrid, so we'll see how it works out.
ImageImage
Gadgetgeek
Athrotaxis selaginoides
 
Posts: 1209
Joined: Sun 23 Sep, 2012 4:10 pm
Region: Queensland
Gender: Male

Re: finally started!

Postby simonm » Sun 24 Aug, 2014 3:11 pm

Nice work - the Argon 90 and 67 is some nice fabric. I have got some Argon silnylon coming in tomorrow to test out. The Argon sil actually uses the Argon 90 as the base fabric.

The 2.2 and 6oz Climashield is due tomorrow as well.
simonm
Athrotaxis selaginoides
 
Posts: 1156
Joined: Tue 30 Apr, 2013 4:40 pm
ASSOCIATED ORGANISATIONS: Tier Gear Tasmania
Region: Tasmania

Re: finally started!

Postby Gadgetgeek » Sun 24 Aug, 2014 6:36 pm

when you look at it, it looks like it will be a harsh, slick fabric. But silky is a very accurate description. And for such a soft hand, it is surprisingly easy to work with on the machine.
Gadgetgeek
Athrotaxis selaginoides
 
Posts: 1209
Joined: Sun 23 Sep, 2012 4:10 pm
Region: Queensland
Gender: Male

Re: finally started!

Postby andrewa » Mon 08 Sep, 2014 11:35 pm

What design did you use? I still need to make an UQ...

A
andrewa
Athrotaxis selaginoides
 
Posts: 1434
Joined: Sat 05 Mar, 2011 5:55 pm
ASSOCIATED ORGANISATIONS: None
Region: Victoria
Gender: Male

Re: finally started!

Postby Gadgetgeek » Tue 09 Sep, 2014 5:56 am

I did a basic square with cinched ends. I'll do the same for the 6oz quilt. This will give me lots of options as far as opening it up for warmer weather, as well as pulling it right up and around when its colder. Not much for design besides that.
Gadgetgeek
Athrotaxis selaginoides
 
Posts: 1209
Joined: Sun 23 Sep, 2012 4:10 pm
Region: Queensland
Gender: Male

Re: finally started!

Postby Gadgetgeek » Thu 18 Sep, 2014 7:21 pm

An update! First, I had to run a few quilt lines up the UQ since I did such a bad job of fixing in the insulation it had started to drop. Oops. On the plus side, it does the job pretty well. took it down to about 10 degrees and only had some slight cool spots on my back. That may be due to having the hammock right in line with the wind due to unforeseen conditions.
So I made a top quilt from the 6.0 Apex, and made a few mistakes. Things I learned. First off, make your seam allowances HUGE if any of your seams are going to be holding the insulation. My method was to stitch one side panel of fabric to the insulation by folding the fabric over, and stitching through. Then I stitched three sides of the other panel, to the "inside out" side, flipped the whole thing right side out, and finished the last side with a rolled hem. It worked..... sorta. I lost way more width than i planned, and also ended up with a far too narrow blanket anyway. I have figured out an adaptation, details to follow when I make that one work. Suffice to say a meter is too narrow for even a little skinny dude like me. Then I went all out and made a nice big wide quilt from the 2.0 in a single layer. Simon you were not kidding, that stuff is insanely wide, really good value! I don't know the dimensions off the top of my head, but its about 2m long and just under 2m wide. Very nice, that argon is really good, I did argon 90 one side, 1.1 breathable nylon the other, and it is really nice. I'm not sure how cold it got overnight. I'm guessing in the 10 degree range, and the UQ and light TQ were just right there for comfort for me, and I get cold pretty easily. I would say for me they would do really good at 15 and warmer.
I will be making a 6.0 underquilt and making it nice and wide, I suspect it will be bulky, but warm. Thats all I want for those 5 degree SEQ hinterland winter nights.

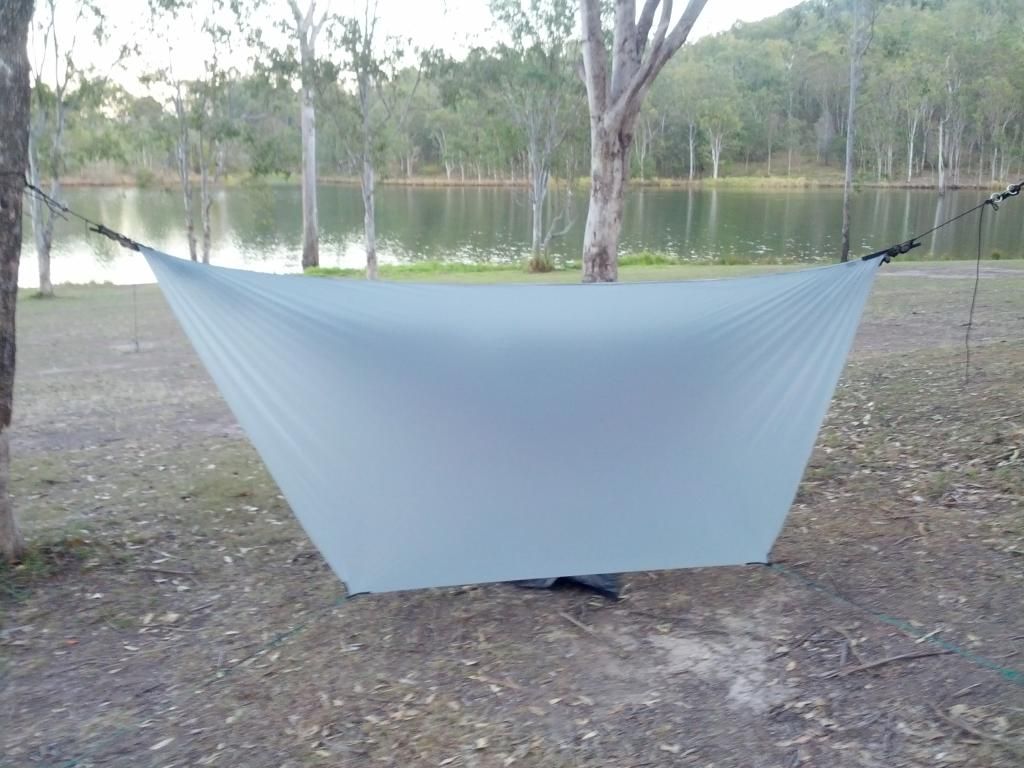
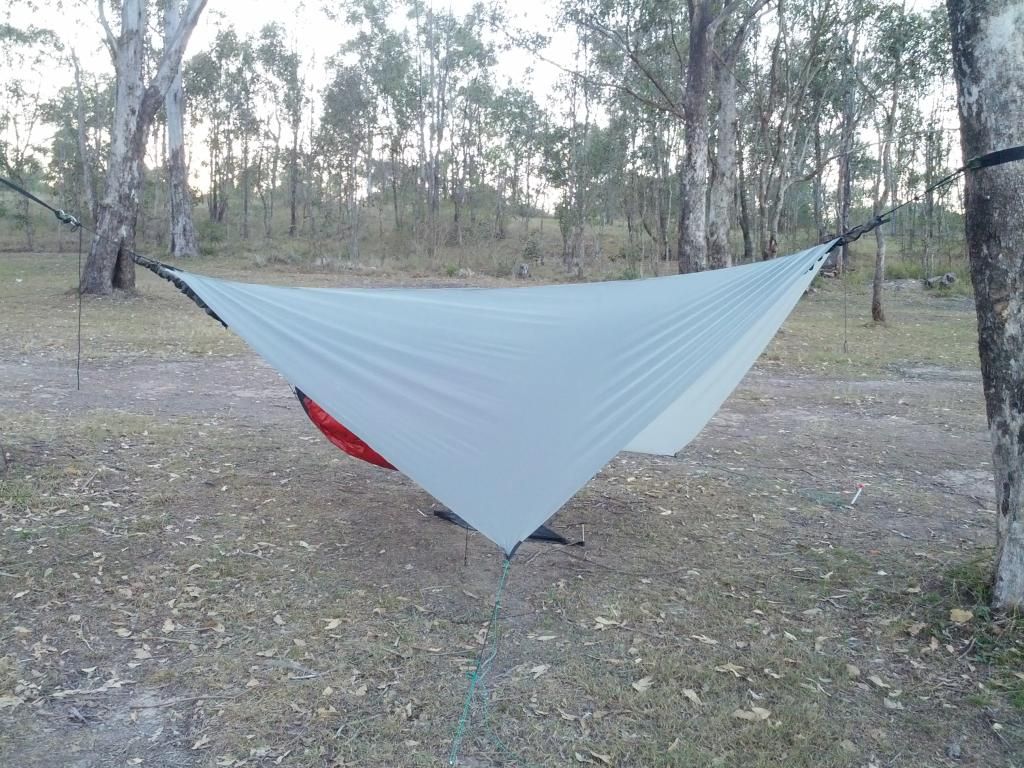
The tarp. Worked GREAT! Only a bit of wind, but it did well. I feel the design is solid, just need to firm up the execution. Pics:
Image
Image

Why the weird shape? simply because on the hennesy asym zip, the netting side is dead space, can't get out that side, and can't really use it. so why bother having lots of hex out that side? I will be working out walking pole loops to raise the hex side as the next part of the plan. I have some ideas....
Gadgetgeek
Athrotaxis selaginoides
 
Posts: 1209
Joined: Sun 23 Sep, 2012 4:10 pm
Region: Queensland
Gender: Male

Re: finally started!

Postby simonm » Sat 20 Sep, 2014 9:12 am

It's always worth trying different designs. That's the great thing about DIY. I think my next tarp will be a hex shape but with built in doors at one end only, although i keep changing my mind.

I think with the 2.2 Climashield being so wide (170cm) it does provide a lot of benefits for design with less material needed. To add to that I think I will start offering it in half meter lengths so that it makes it a bit more cost effective for people, actually I might do that with a few of the quilt specific fabrics.
simonm
Athrotaxis selaginoides
 
Posts: 1156
Joined: Tue 30 Apr, 2013 4:40 pm
ASSOCIATED ORGANISATIONS: Tier Gear Tasmania
Region: Tasmania

Re: finally started!

Postby Bluegum Mic » Sat 20 Sep, 2014 12:40 pm

Oooooooh. Hex tarp with doors. I'll be watching for that one =D
User avatar
Bluegum Mic
Athrotaxis selaginoides
 
Posts: 1535
Joined: Fri 08 Oct, 2010 10:24 am
Region: New South Wales
Gender: Female

Re: finally started!

Postby ofuros » Sat 20 Sep, 2014 1:14 pm

I missed this one....aaah all those little mistakes, I know the feeling...steep leaning curve, makes for a smooth attempt next time !
Mountain views are good for my soul...& getting to them is good for my waistline !
https://ofuros.exposure.co/
User avatar
ofuros
Athrotaxis selaginoides
 
Posts: 1954
Joined: Fri 05 Feb, 2010 4:42 pm
Region: Queensland
Gender: Male


Return to Make Your Own Gear

Who is online

Users browsing this forum: No registered users and 6 guests