Post processing of photos
Forum rules
Please note that the extended image rules for the Gallery forum also apply here.
Please note that the extended image rules for the Gallery forum also apply here.
52 posts
• Page 2 of 2 • 1, 2
Re: Post processing of photos
Warren it's clear that your digital manipulation skills are far greater than anything this forum has encountered to date.
There has been some discussion on whether or not to post-process photographs, at what point in post-processing does a photo stop being a photo and start being "art"?
What I mean is, I know photography is a form of art, but would your works demonstrated above be classified as photographs, or art? Not that there is anything wrong with either, just that it is so different to photography in the way it is usually used.
-
tasadam - Magnus administratio

- Posts: 5900
- Joined: Tue 10 Apr, 2007 6:58 pm
- Location: Near Devonport, Tasmania
- ASSOCIATED ORGANISATIONS: TasmaniART, Smitten Merino, Macpac
- Region: Tasmania
- Gender: Male
Re: Post processing of photos
tasdam, G'day Mate.
Your question is complex and I'm not sure if I can answer it accurately ... because I don't fully understand why I do what I do.
I have studied the history Australian landscape art and the techniques of the artists, ... I saw a hole in the jig-saw puzzle of World Art called Australian landscape art, that could involve this digital medium, so I guess I'm trying to fill that hole.
Bruce Ford, a Senior Curator from the ANG, when the ANG first took an interest in my digital art (12 years ago), said to me, "Changing the techniques of art, changes the artefact called ART. Change the artefact and you will influential." OK then, that didn't sound to difficult, so I'm giving that a go then, .
.
All I know is that I'm an Australian landscape artist, and the photographic medium that I used is Digital Photography. I've not ever done a Tasmanian landscape. I often wonder what wet mud would be like.
I do ceramic sculpture of Australian landscapes, clifflines and ridges and stuff, so I'm used to handling nice mud ... but I'm getting the feeling that Tasmania might not be able to handle my digital post-processing.
I should post a few more post-processed shots, from the World's first gazetted National Park. It is here in Australia.
Back shortly.
Warren.
Your question is complex and I'm not sure if I can answer it accurately ... because I don't fully understand why I do what I do.
I have studied the history Australian landscape art and the techniques of the artists, ... I saw a hole in the jig-saw puzzle of World Art called Australian landscape art, that could involve this digital medium, so I guess I'm trying to fill that hole.
Bruce Ford, a Senior Curator from the ANG, when the ANG first took an interest in my digital art (12 years ago), said to me, "Changing the techniques of art, changes the artefact called ART. Change the artefact and you will influential." OK then, that didn't sound to difficult, so I'm giving that a go then,
All I know is that I'm an Australian landscape artist, and the photographic medium that I used is Digital Photography. I've not ever done a Tasmanian landscape. I often wonder what wet mud would be like.
I do ceramic sculpture of Australian landscapes, clifflines and ridges and stuff, so I'm used to handling nice mud ... but I'm getting the feeling that Tasmania might not be able to handle my digital post-processing.
I should post a few more post-processed shots, from the World's first gazetted National Park. It is here in Australia.
Back shortly.
Warren.
- WarrenH
- Phyllocladus aspleniifolius

- Posts: 990
- Joined: Thu 07 Jan, 2010 6:54 pm
- Region: Australian Capital Territory
Re: Post processing of photos
Hi Warren,
Wow, your photos are stunning. I agree with Adam's comments. Without knowing that they're processed digital images I would have assumed that the medium had nothing to do with photography. And you certainly know how to capture the mood of each shot. Fantastic work!
Now you've got me intrigued. My current understanding is that Yellowstone NP in USA (1877) was the first. followed by Royal NP in Sydney (1879) being the second. I look forward to seeing the shots, wherever they're from.
Wow, your photos are stunning. I agree with Adam's comments. Without knowing that they're processed digital images I would have assumed that the medium had nothing to do with photography. And you certainly know how to capture the mood of each shot. Fantastic work!
WarrenH wrote:I should post a few more post-processed shots, from the World's first gazetted National Park. It is here in Australia.
Now you've got me intrigued. My current understanding is that Yellowstone NP in USA (1877) was the first. followed by Royal NP in Sydney (1879) being the second. I look forward to seeing the shots, wherever they're from.
John W
In Nature's keeping they are safe, but through the agency of man destruction is making rapid progress - John Muir c1912
In Nature's keeping they are safe, but through the agency of man destruction is making rapid progress - John Muir c1912
-
johnw - Lagarostrobos franklinii

- Posts: 9593
- Joined: Wed 23 Jan, 2008 11:59 am
- Location: Macarthur Region - SW Sydney
- Region: New South Wales
- Gender: Male
Re: Post processing of photos
John, Although Yellowstone pioneered the modern park system, Yellowstone became a National Park. Yellowstone was first declared as something like 'Yellowstone Public Park and Wildlands Reserve' and then later had a name change to Yellowstone National Park. I read this on one of Royal National Park's old brochures (of all places  ). I've been unable to find Yellowstone National Park's original name.
We all know it was Yellowstone of course, but as a one-eyed New South Welshman, to me, which was really the World's first gazetted National Park is not an issue .
.
Warren.
We all know it was Yellowstone of course, but as a one-eyed New South Welshman, to me, which was really the World's first gazetted National Park is not an issue
Warren.
- WarrenH
- Phyllocladus aspleniifolius

- Posts: 990
- Joined: Thu 07 Jan, 2010 6:54 pm
- Region: Australian Capital Territory
Re: Post processing of photos
WarrenH wrote:John, Although Yellowstone pioneered the modern park system, Yellowstone became a National Park. Yellowstone was first declared as something like 'Yellowstone Public Park and Wildlands Reserve' and then later had a name change to Yellowstone National Park. I read this on one of Royal National Park's old brochures (of all places). I've been unable to find Yellowstone National Park's original name.
We all know it was Yellowstone of course, but as a one-eyed New South Welshman, to me, which was really the World's first gazetted National Park is not an issue.
As another one I'm also happy to go along with that Warren
http://www.tramp.com.au/tramp-articles/1999/8/21/spring-in-the-park/
"although Yellowstone opened in 1872 as a "public park" or "pleasuring ground", it apparently wasn't actually dubbed a national park until 1883 - four years after our Royal National Park was legally gazetted in 1879."
http://www.cityrail.info/travelling_with/places_to_go/further_afield
"Sydney's Royal National Park was the first gazetted national park in the world."
(momentarily putting aside my battle scars as a CityRail commuter for more years than I care to remember)
John W
In Nature's keeping they are safe, but through the agency of man destruction is making rapid progress - John Muir c1912
In Nature's keeping they are safe, but through the agency of man destruction is making rapid progress - John Muir c1912
-

johnw - Lagarostrobos franklinii

- Posts: 9593
- Joined: Wed 23 Jan, 2008 11:59 am
- Location: Macarthur Region - SW Sydney
- Region: New South Wales
- Gender: Male
Re: Post processing of photos
Not sure if we have any of those 'pleasuring grounds' here... 
Photographer and bushwalker
For hiking trails we've completed around the world: Fork and Foot
For hiking trails we've completed around the world: Fork and Foot
-

stoogest - Athrotaxis cupressoides

- Posts: 163
- Joined: Tue 13 Jan, 2009 10:20 am
- Region: Tasmania
Re: Post processing of photos
stoogest wrote:Not sure if we have any of those 'pleasuring grounds' here...
John W
In Nature's keeping they are safe, but through the agency of man destruction is making rapid progress - John Muir c1912
In Nature's keeping they are safe, but through the agency of man destruction is making rapid progress - John Muir c1912
-

johnw - Lagarostrobos franklinii

- Posts: 9593
- Joined: Wed 23 Jan, 2008 11:59 am
- Location: Macarthur Region - SW Sydney
- Region: New South Wales
- Gender: Male
Re: Post processing of photos
stroogest, very funny. I lost the track on the Bubdeena to Otford walk in Royal once, when I walked out to one of the headlands. I can assure you that there were no "pleasuring grounds" hidden in the Teatree, while going cross country, trying to regain the track.
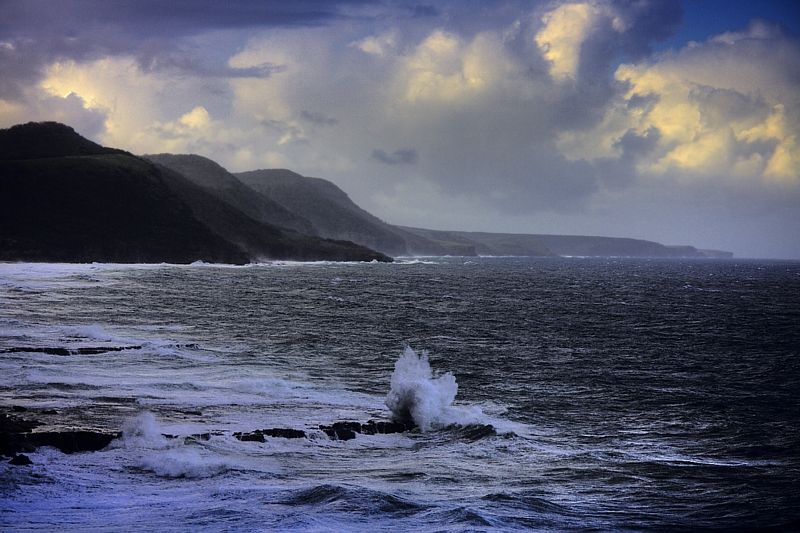
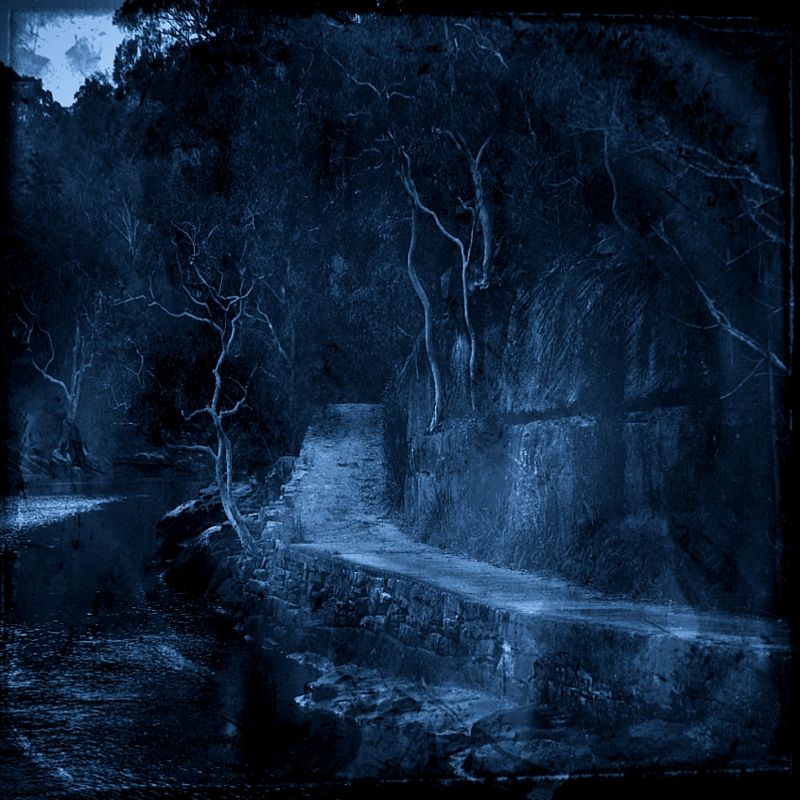
Some post processed images from Royal. I'm always trying to obtain the maximum in highlight detail while retaining good shadow detail ... and at the same time achieving a solid black, somewhere in the image. I don't mind black voids in my images if they add some drama.
'The Royal Seacliffs'. 2009. Photo of a passing storm. Photo taken from the seacliff bridge near Coalcliff.
'Below Artilery Hill'. 2009. A quite reach on the Hacking River.
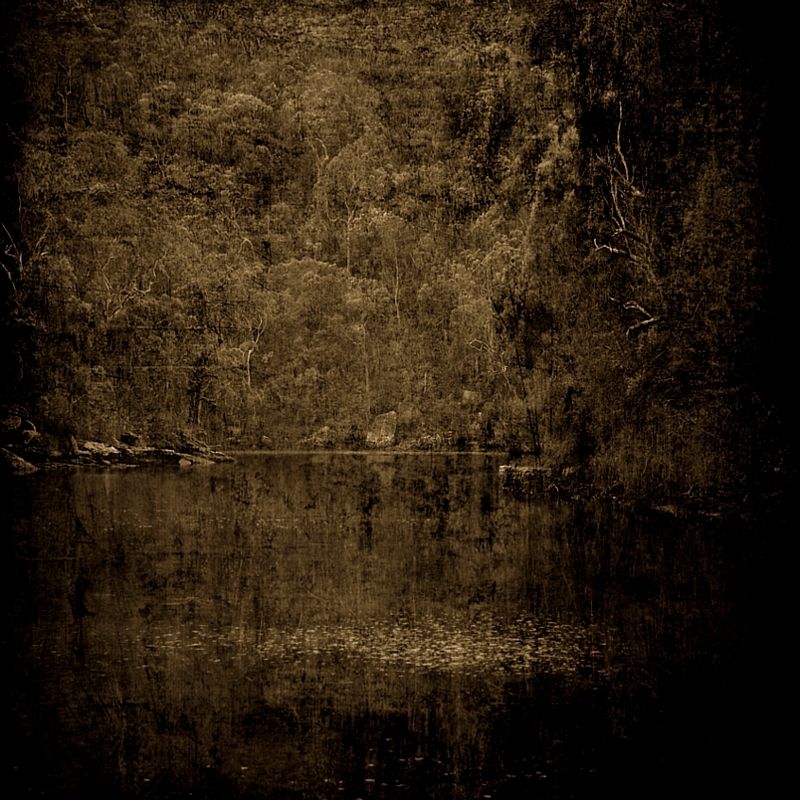
'Ethereally Up A Creek'. 2009. The ford at Audley.
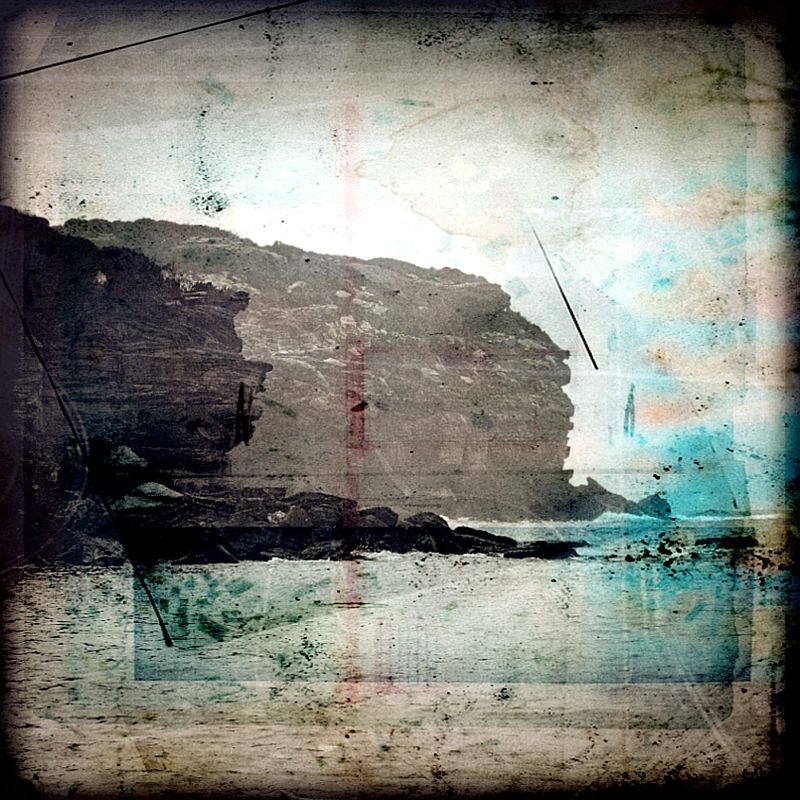
'Devil on One Shoulder'. 2009. The cliffs at Watamolla.
Warren.
Some post processed images from Royal. I'm always trying to obtain the maximum in highlight detail while retaining good shadow detail ... and at the same time achieving a solid black, somewhere in the image. I don't mind black voids in my images if they add some drama.
'The Royal Seacliffs'. 2009. Photo of a passing storm. Photo taken from the seacliff bridge near Coalcliff.

'Below Artilery Hill'. 2009. A quite reach on the Hacking River.

'Ethereally Up A Creek'. 2009. The ford at Audley.

'Devil on One Shoulder'. 2009. The cliffs at Watamolla.

Warren.
- WarrenH
- Phyllocladus aspleniifolius

- Posts: 990
- Joined: Thu 07 Jan, 2010 6:54 pm
- Region: Australian Capital Territory
Re: Post processing of photos
Is that a plugin that you're using for the processing Warren or do you do each image from scratch?
Photographer and bushwalker
For hiking trails we've completed around the world: Fork and Foot
For hiking trails we've completed around the world: Fork and Foot
-

stoogest - Athrotaxis cupressoides

- Posts: 163
- Joined: Tue 13 Jan, 2009 10:20 am
- Region: Tasmania
Re: Post processing of photos
stoogest, I don't use plugins, I don't use Photoshop. I create the images from scratch, layer by layers.
I like the old photographic techniques, like Daguerreotype, Calotype, Cyanotype and Tintype, wet plates and all that sort of stuff, so I muck around trying to duplicate those old retro looks,digitally.
Warren.
I like the old photographic techniques, like Daguerreotype, Calotype, Cyanotype and Tintype, wet plates and all that sort of stuff, so I muck around trying to duplicate those old retro looks,digitally.
Warren.
Last edited by WarrenH on Fri 15 Jan, 2010 9:18 pm, edited 1 time in total.
- WarrenH
- Phyllocladus aspleniifolius

- Posts: 990
- Joined: Thu 07 Jan, 2010 6:54 pm
- Region: Australian Capital Territory
Re: Post processing of photos
I've never used film myself so I'm not sure what process is involved. Is it easy to explain (for that last photo perhaps)?
Photographer and bushwalker
For hiking trails we've completed around the world: Fork and Foot
For hiking trails we've completed around the world: Fork and Foot
-

stoogest - Athrotaxis cupressoides

- Posts: 163
- Joined: Tue 13 Jan, 2009 10:20 am
- Region: Tasmania
Re: Post processing of photos
Last year I shot a lot of film, and digital about 50/50, but this year I'll mostly shoot digital.
The last image is all digital. I think that I still have most of the stages of the production of the image. It will take a while to find the photos but I'll put something together.
Warren.
The last image is all digital. I think that I still have most of the stages of the production of the image. It will take a while to find the photos but I'll put something together.
Warren.
- WarrenH
- Phyllocladus aspleniifolius

- Posts: 990
- Joined: Thu 07 Jan, 2010 6:54 pm
- Region: Australian Capital Territory
Re: Post processing of photos
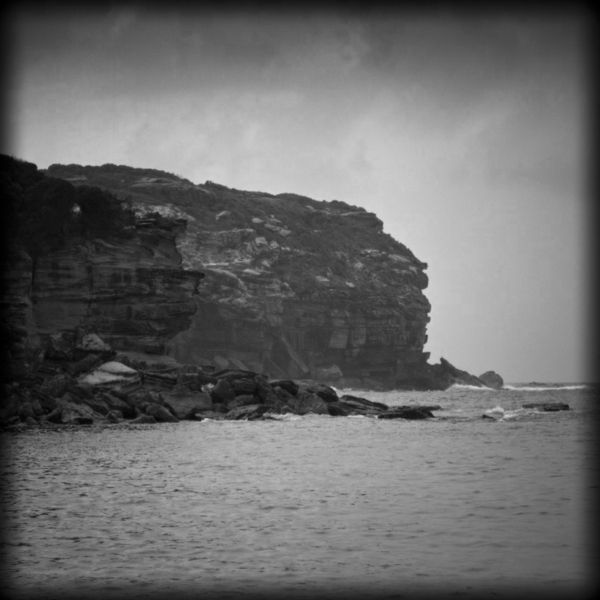
I had been looking forward to making this image for a while, but I hadn't found the conditions right each time that I visited Royal. Then on a smoky day last year when I was visiting Sydney, I called into Royal and the atmosphere was the best I had encountered for the shot. I didn't need a great shot of the Watamolla sea cliffs, I just wanted an atmospheric shot that showed good aerial perspective, to give an adequate tonal separation between the cliffs ... the smoke was perfect.
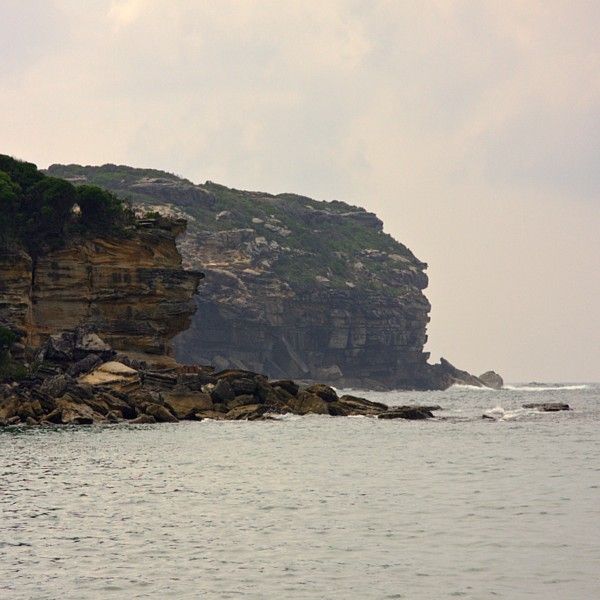
I put the RAW file into Lightroom and made the border and checked out the tones.
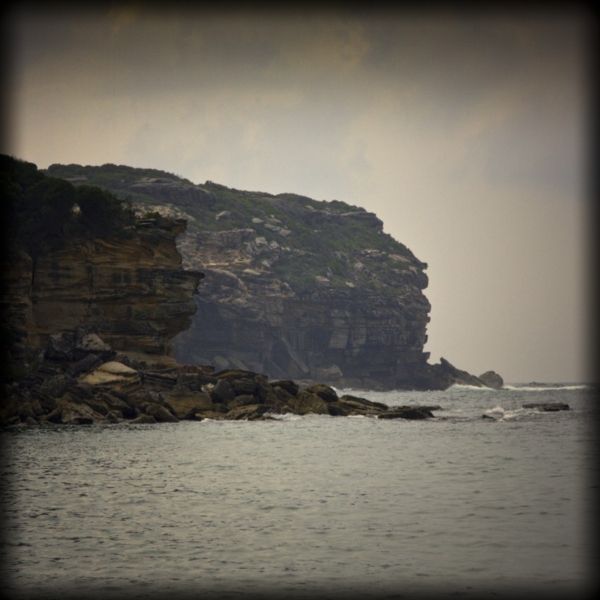
The file was then transferred to Canon's Arcsoft programme where I separated the colour image into its RBG layers, one of the layers was selected to work with. That individual layer was recombined into being a full RBG file while remaining as a black and white. I do this so that I can colour tint the black and white layer or bring colour details into the image at any stage (in the future). At this stage it is a good time to start enhancing the tonalities in the b/w.
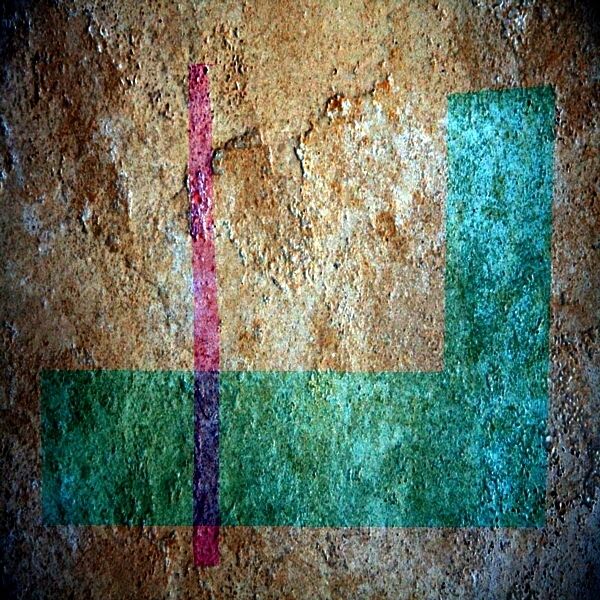
The next stage involves adding a texture layer. There are plenty of resources on the web, if you are looking for texture layers, or you can photograph your own grunge textures. Which can be as simple as photographing a ceramic kitchen floor tile, or a rusty bit of metal, and turning it into an abstract image and further de-constructing it. The texture layers, if you make your own can be a fantastic resource, if you like the retro grunge look. You can even buy, texture packs on Ebay for doing this very same thing. I slapped the next three images together quick-and-dirty, to show how texture layers can work, and how simple they can be reworked. These aren't the textures in the shot, they were made for this re-enactment.
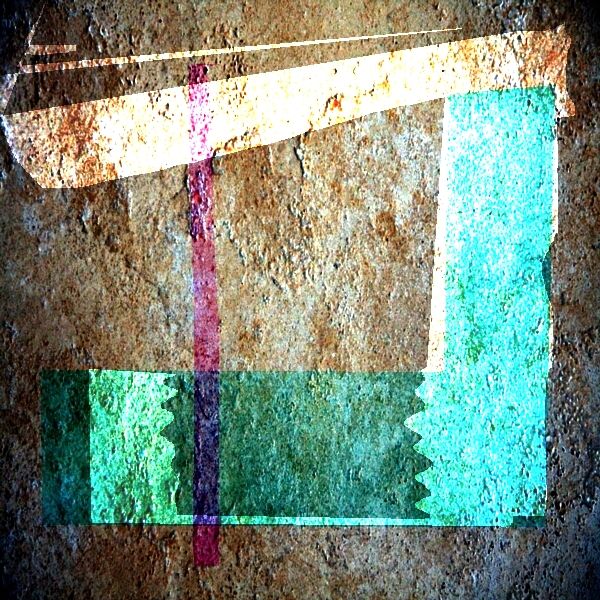
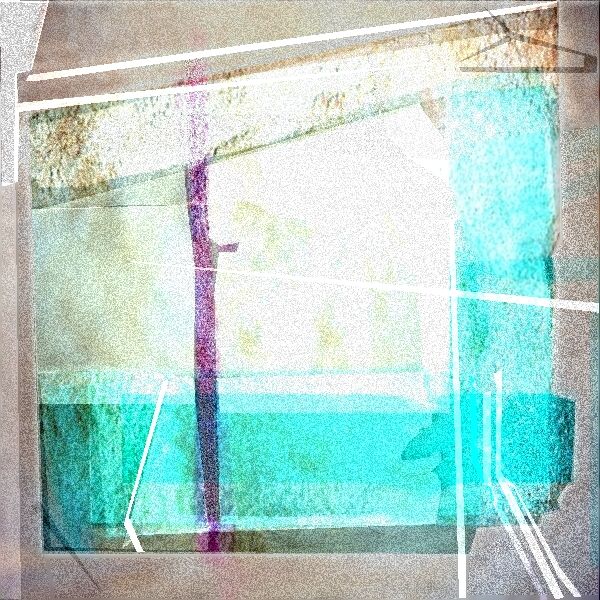
Once the texture layer appears right for the needs, and has been adequately de-constructed, to give a grunge look, it can be layered into the image. This stage can require a lot of tweaking. Expect lots of failures and lots of work to find the right balance of blending the textures and layers. At this stage there is much cloning, erasing, selective sharpening or softening, adding dirt and grain and off-setting layers by tilting or overlapping them. The cloning of the elements within the texture layer, gets a fair degree of priority at this stage. As complex as this can appear, I always try to remember things lecturers have said to me, "Don't overwork a painting," "Let the canvas show through the paint" and "Leave room for the imagination of others, to enter your work." I'm not ever trying to be more complex than needed, I'm always trying to simplify the image as much as poss.
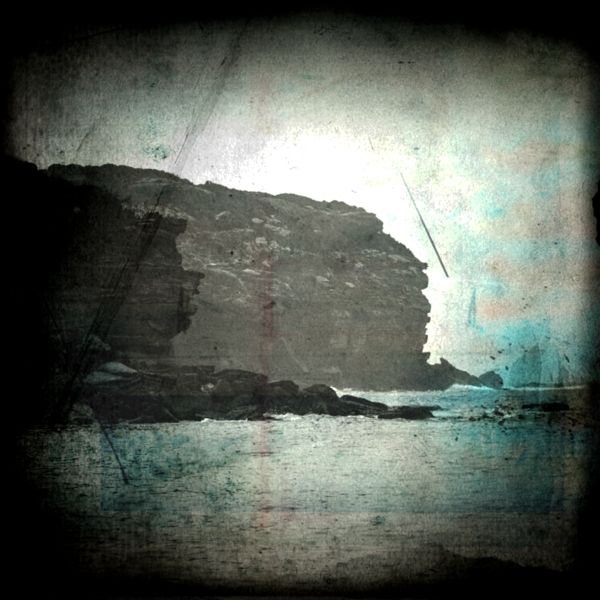
Having converted the individual B/W layer back to being a combined RBG image back at the start of the process, allows me to tint the B/W at any stage.
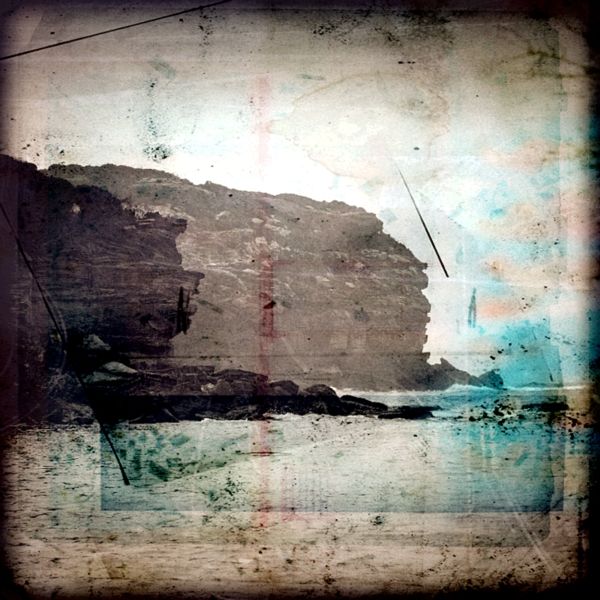
More tweaking then the final image is ready? I didn't say finished, because an artwork is not ever finished. Each work is just another stage of the process ... until I can kick that devil off my shoulder.
'Devil On One Shoulder' 2009.

Warren.

I put the RAW file into Lightroom and made the border and checked out the tones.

The file was then transferred to Canon's Arcsoft programme where I separated the colour image into its RBG layers, one of the layers was selected to work with. That individual layer was recombined into being a full RBG file while remaining as a black and white. I do this so that I can colour tint the black and white layer or bring colour details into the image at any stage (in the future). At this stage it is a good time to start enhancing the tonalities in the b/w.

The next stage involves adding a texture layer. There are plenty of resources on the web, if you are looking for texture layers, or you can photograph your own grunge textures. Which can be as simple as photographing a ceramic kitchen floor tile, or a rusty bit of metal, and turning it into an abstract image and further de-constructing it. The texture layers, if you make your own can be a fantastic resource, if you like the retro grunge look. You can even buy, texture packs on Ebay for doing this very same thing. I slapped the next three images together quick-and-dirty, to show how texture layers can work, and how simple they can be reworked. These aren't the textures in the shot, they were made for this re-enactment.


Once the texture layer appears right for the needs, and has been adequately de-constructed, to give a grunge look, it can be layered into the image. This stage can require a lot of tweaking. Expect lots of failures and lots of work to find the right balance of blending the textures and layers. At this stage there is much cloning, erasing, selective sharpening or softening, adding dirt and grain and off-setting layers by tilting or overlapping them. The cloning of the elements within the texture layer, gets a fair degree of priority at this stage. As complex as this can appear, I always try to remember things lecturers have said to me, "Don't overwork a painting," "Let the canvas show through the paint" and "Leave room for the imagination of others, to enter your work." I'm not ever trying to be more complex than needed, I'm always trying to simplify the image as much as poss.

Having converted the individual B/W layer back to being a combined RBG image back at the start of the process, allows me to tint the B/W at any stage.

More tweaking then the final image is ready? I didn't say finished, because an artwork is not ever finished. Each work is just another stage of the process ... until I can kick that devil off my shoulder.
'Devil On One Shoulder' 2009.

Warren.
Last edited by WarrenH on Sat 16 Jan, 2010 12:15 pm, edited 8 times in total.
- WarrenH
- Phyllocladus aspleniifolius

- Posts: 990
- Joined: Thu 07 Jan, 2010 6:54 pm
- Region: Australian Capital Territory
Re: Post processing of photos
Wow! That's really interesting to see how you do that. I think I might post a link to this thread over in the AusPhotography forum as I reckon there'd be some over there that would be interested in this as well.
Cheers!
Andrew.
Cheers!
Andrew.
Photographer and bushwalker
For hiking trails we've completed around the world: Fork and Foot
For hiking trails we've completed around the world: Fork and Foot
-

stoogest - Athrotaxis cupressoides

- Posts: 163
- Joined: Tue 13 Jan, 2009 10:20 am
- Region: Tasmania
Re: Post processing of photos
Andrew, I'm pleased that you found the post interesting. I'm sorry that the continuity of the stages was not perfectly sequenced. As long as the idea and impression of what happens is there, I guess that is all that mattered.
Thank you Mate. I'm happy to say that normally photographers like my straight shots, but on a photo forum like AusPhoto, I don't know how this type of post processing will go down. Hopefully the wilder the better.
I do take straight shots, but only of rainforests. One should not tamper with the sanctity of a rainforest.
Warren.
- WarrenH
- Phyllocladus aspleniifolius

- Posts: 990
- Joined: Thu 07 Jan, 2010 6:54 pm
- Region: Australian Capital Territory
Re: Post processing of photos
If anyone wants to have a sneak peek at what is possible in the realm of digital editing these days with the new CS5, check this out!
http://tv.adobe.com/watch/photoshop-cs5 ... -features/
Amazing! I'm impressed...
Problem...
Adobe Creative Suite 5 Design premium is over $3000 to buy.
http://tv.adobe.com/watch/photoshop-cs5 ... -features/
Amazing! I'm impressed...
Problem...
Adobe Creative Suite 5 Design premium is over $3000 to buy.
-

tasadam - Magnus administratio

- Posts: 5900
- Joined: Tue 10 Apr, 2007 6:58 pm
- Location: Near Devonport, Tasmania
- ASSOCIATED ORGANISATIONS: TasmaniART, Smitten Merino, Macpac
- Region: Tasmania
- Gender: Male
Re: Post processing of photos
Fairly well hidden, but you can buy the individual packages, and Photoshop CS5 standard sounds like enough to do all you'd need to with photos (unless you're "Clownfish").
Adobe Photoshop CS5 - $1168.
Adobe Photoshop CS5 - $1168.
-

tasadam - Magnus administratio

- Posts: 5900
- Joined: Tue 10 Apr, 2007 6:58 pm
- Location: Near Devonport, Tasmania
- ASSOCIATED ORGANISATIONS: TasmaniART, Smitten Merino, Macpac
- Region: Tasmania
- Gender: Male
Re: Post processing of photos
Seems not everyone post processes their photos to everyones liking. I've been looking at a few photos and I find an element of post processing very distracting.
Here's two examples -
http://www.everlookphotography.com/Aust ... 3088_4yBwc
The bright hue around little horn is obviously artificial. Maybe some people like that.
http://www.tryanphotos.com/Landscape/Ta ... 2372_gEJtM
Selective shadowing of the clouds has overlapped on the mountain and it wrecks the image for me.
http://www.tryanphotos.com/Landscape/Ta ... 9720_9WYHE
If you're going to darken the sky, don't overdo it. Looks dramatic, also looks fake.
- Walker
- Nothofagus gunnii

- Posts: 15
- Joined: Tue 09 Feb, 2010 10:02 am
- Region: Tasmania
Re: Post processing of photos
It's certainly all comes down to personal preference. In the interest of a balanced argument though, the post-processing that goes into your photos is just as 'fake' to me as the last image that you linked to above. Not necessarily saying either is a bad image, it's just obviously processed.
Personally, I agree that the last image is too overdone, however the other two images are certainly not post-processed to the point that I don't like the images. Dylan Toh's work in particular I have been following for some time now and he definitely a cut above your average photographer. I believe his recent portfolio taken in Iceland was featured in an Australian photography magazine?
Cheers!
Andrew.
Photographer and bushwalker
For hiking trails we've completed around the world: Fork and Foot
For hiking trails we've completed around the world: Fork and Foot
-

stoogest - Athrotaxis cupressoides

- Posts: 163
- Joined: Tue 13 Jan, 2009 10:20 am
- Region: Tasmania
Re: Post processing of photos
Not me, I have no photos.stoogest wrote: the post-processing that goes into your photos is just as 'fake' to me as the last image that you linked to above.
- Walker
- Nothofagus gunnii

- Posts: 15
- Joined: Tue 09 Feb, 2010 10:02 am
- Region: Tasmania
Re: Post processing of photos
I agree that it comes down to personal preferences. Another aspect which one should not underestimate is that we are all looking at those photos from different screen and evry screen will give you a different image.
- samh
- Athrotaxis cupressoides

- Posts: 257
- Joined: Mon 02 Mar, 2009 9:12 pm
- Region: Tasmania
Re: Post processing of photos
Well, it's taken me a while to figure out how to respond to this one!
I agree that it all comes down to personal preferences as to how each of us want to interpret our own and others' images. But I think there is some common ground where most people can agree that any particular image is great - even though we might not really be able to express why we think so.
Lex and Warren have provided great examples. Warren's example above was great even before he did anything to it, because the light, the composition and everything else came together in the original shot. And I guess it would be the same for the originals of the shots Warren showed the post-processing final products of earlier in the thread. Lex's shot on the beach clearly doesn't need much processing at all, it has great impact right from the start.
Post processing is fine if you have the time and inclination for it. Only proviso I can see is the old adage, "Rubbish in - rubbish out", so the shot needs to be good when its taken.
That makes it hard for me, coz most of my shots are rubbish anyway...
Swifty
Ossua vetera
Ossua vetera
-
Swifty - Athrotaxis cupressoides

- Posts: 351
- Joined: Wed 10 Dec, 2008 3:56 pm
- Location: Perth
- Region: Western Australia
- Gender: Male
52 posts
• Page 2 of 2 • 1, 2
Who is online
Users browsing this forum: No registered users and 1 guest
